Got the other rear corner guard and flare on last night and began to drill the holes for the tail lights and backup lights. Used a 4 1/2" bi-metal hole saw for the tail lights along with a bunch of oil. Worked pretty good. Wasn't easy.

I'm pretty sure I killed my drill. It was releasing copious amounts of the magic smoke.

Got all 4 holes drilled.

And then realized I did not put as much thought into the planning of these lights as I should have. There is no way (without making my own access) to get the nut on the back of the backup lights in that lower panel. Duh. Will work on that tonight.
I also managed to wire the tail lights incorrectly. The driver side was easy because there were only 3 wires (turn, brake and backup), but the passenger side was a little more confusing. It has 4 wires (turn, brake, backup and the turn from the driver side also runs over there). I accidentally plugged in the wrong turn wire. So now both lights blink when you turn on the left turn signal. Woops. But tonight I am going to work on the sliders first. Then I will get back to the wiring.

I'm pretty sure I killed my drill. It was releasing copious amounts of the magic smoke.

Got all 4 holes drilled.

And then realized I did not put as much thought into the planning of these lights as I should have. There is no way (without making my own access) to get the nut on the back of the backup lights in that lower panel. Duh. Will work on that tonight.
I also managed to wire the tail lights incorrectly. The driver side was easy because there were only 3 wires (turn, brake and backup), but the passenger side was a little more confusing. It has 4 wires (turn, brake, backup and the turn from the driver side also runs over there). I accidentally plugged in the wrong turn wire. So now both lights blink when you turn on the left turn signal. Woops. But tonight I am going to work on the sliders first. Then I will get back to the wiring.
Last edited:
Last night I got the rock sliders installed. That concludes the installation of the MetalCloak armor. I still have the windshield armor and the new skid plates. Then I moved on to fixing the taillight wiring. I had to remove the lights (not easy) and then rework all the wiring I did because it was all wrong. Would be nice if Genright included some sort of instructions, but they don't. But they were helpful on the phone (but that doesn't help after hours or on the weekend).
Drove it to work today.


Had to tighten all of the jam nuts on the front end. Not one of them was tight. Tonight I will put in the reverse lights, put on the windshield armor and clean and prime the skid plates.
Items that still need done:
Items with ** need to be done before the trip.
Drove it to work today.


Had to tighten all of the jam nuts on the front end. Not one of them was tight. Tonight I will put in the reverse lights, put on the windshield armor and clean and prime the skid plates.
Items that still need done:
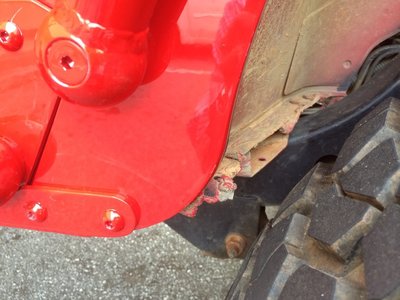
- Cut parts of the tub out of the rear wheel arches.
- **Flex it out to make sure nothing rubs the trimmed inner fenders.
- Mount new windshield washer bottle and test.
- Install backup lights.
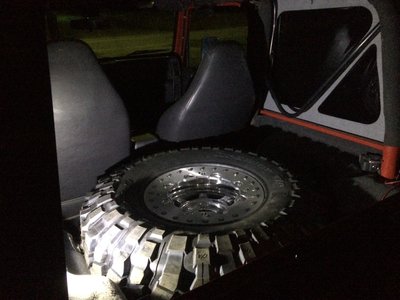
- Reinforce spare tire carrier and install.
- Install license plate holder.
- **Clean and paint skid plates.
- **Install skid plates.
- See if I can figure out where the stop nuts should go on the coilovers.
- Install the on-board air system (probably not going to happen before OSCAR3).
- **Run the front gears through 4 heat cycles.
- **Change the fluid in the front diff after heat cycles.
- **Pack up the tools and spare parts.
- **Take bunches of pictures because it will never look like this again :smile:
- **Mount the CB antenna somewhere
Items with ** need to be done before the trip.
Last edited:
Yes, that was my choice. I wanted it to sit low so to keep the axle out of the radiator/oil pan, I had to put the bumps to where they are about an inch off the plates. That gives the 1" travel plus another 2" in the bumps. So I am loosing about 4" of up travel that the coilovers have (in full squat) It works out really well. The axle will droop out 7" per side and fully flexed the bumps keep the tire barely off the fenders. And during flex that extra 4"s gets used.


