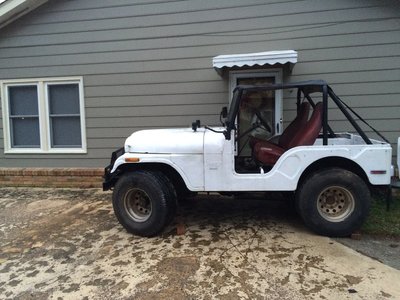
The Starting Point: I got the Jeep bug after my brother bought a YJ. Since then I've had a handful of Grand Wagoneers and XJs but really liked the simplicity of the Rango build and wanted something smaller. I went back and forth with a guy on Craigslist for a while about this Jeep. Not having a tow rig I didn't want to rent a truck and a trailer just to go find out it was a piece of junk. The guy swore the body was solid but said that a rod came out the side of the block. He offered to deliver it since he dove a flatbed tow truck. When he arrived it was well after dark. I could tell the floor was not solid but I couldn't tell how bad it really was. We negotiated the price a little more and the Jeep was mine. In hindsight I probably should have sent it back home with him and kept looking but the wife had given the okay and I didn't want to risk her changing her mind.
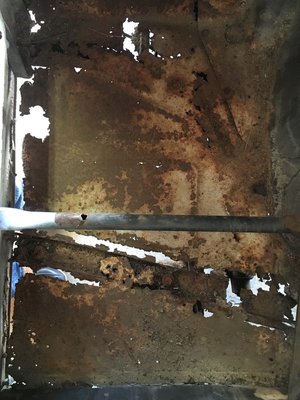
Passenger floorboard:
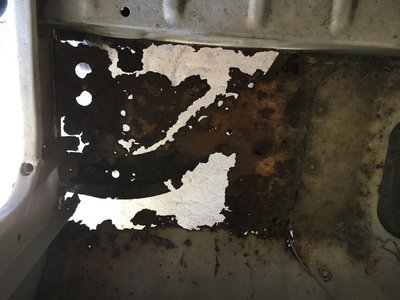
Driver floorboard:
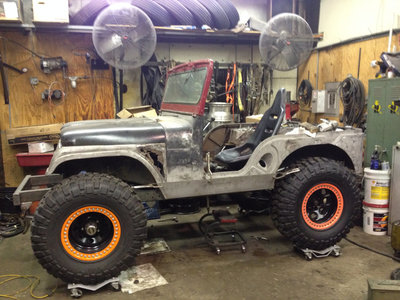
Build Plan:
Engine: 305 SBC (Donated from a buddy's parts truck)
Transmission: SM465 (Rebuilt)
Transfer Case: Dana 18 (Have but needs a rebuild. Hopefully will end up with overdrive)
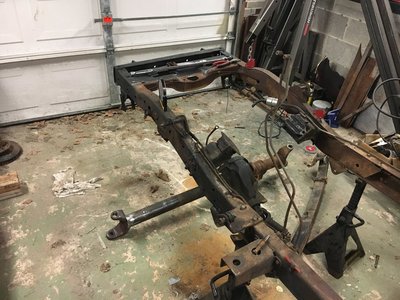
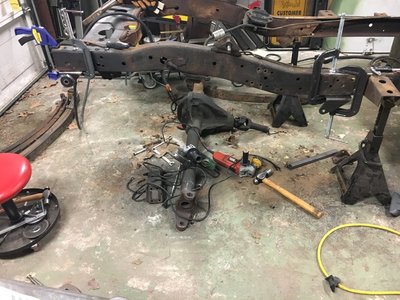
Front Axle: Narrowed J-10 Dana 44 (Complete minus cut down long side shaft)
Rear Axle: Full float Dana 44 (build from an offset Wagoneer rear)
Tires: 37" on 17s
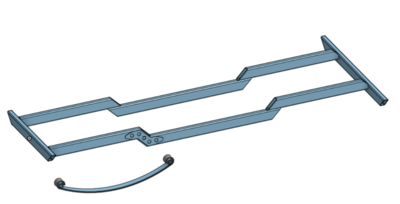
Wheelbase: 4" Rear Stretch
Suspension: YJ leaf springs with minimal lift
Body Mods: Highline Stock Fenders
There truly is nothing new under the sun. I found this while doing research for this build. It is an early CJ5 (shorter wheelbase) with 37" tires, 4" rear stretch and the same body mods I was planning.
Passenger floorboard:
Driver floorboard:
Build Plan:
Engine: 305 SBC (Donated from a buddy's parts truck)
Transmission: SM465 (Rebuilt)
Transfer Case: Dana 18 (Have but needs a rebuild. Hopefully will end up with overdrive)
Front Axle: Narrowed J-10 Dana 44 (Complete minus cut down long side shaft)
Rear Axle: Full float Dana 44 (build from an offset Wagoneer rear)
Tires: 37" on 17s
Wheelbase: 4" Rear Stretch
Suspension: YJ leaf springs with minimal lift
Body Mods: Highline Stock Fenders
There truly is nothing new under the sun. I found this while doing research for this build. It is an early CJ5 (shorter wheelbase) with 37" tires, 4" rear stretch and the same body mods I was planning.
Last edited: