Fleetwood Neon trail camper

#41
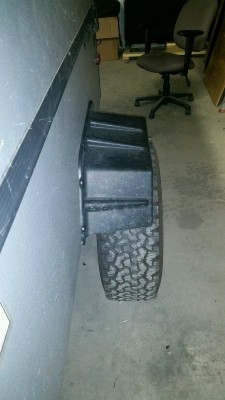
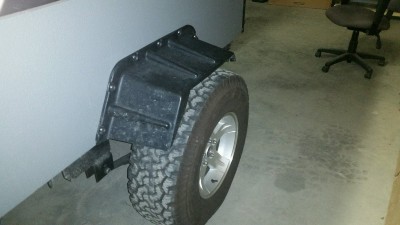
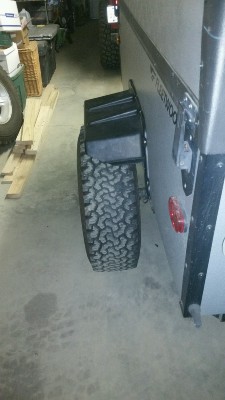
I am done with wheels and tires.

20151101_190356_zps9bobxmft.jpg

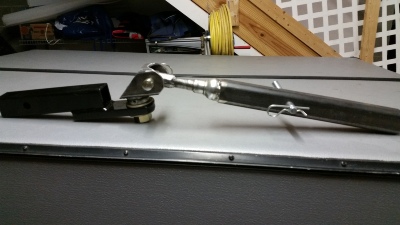
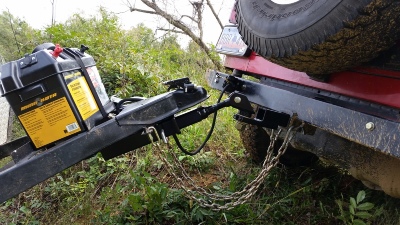
Tripp and I spent a few hours Sunday building the coupler. Here's the major components before being welded into the 2" tube.

20151102_182155_zpsf0ohojea.jpg

20151102_182202_zpsppygwoxu.jpg

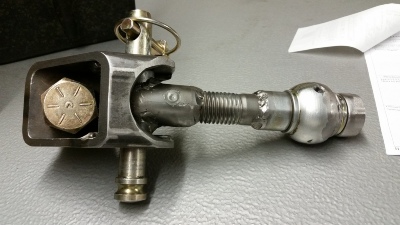
I need to weld the receiver tube to the trailer tongue, determine how long to cut the 2" piece, and weld the T in it, but that will have to wait a couple weekends.
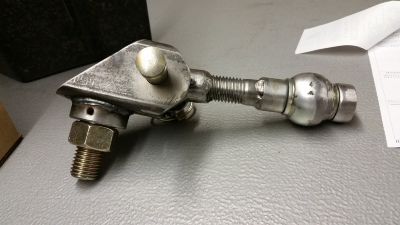
Turned out good Larry, should work well


Sent from my iPad using Tapatalk
 
#44
Took 360 Camera out to the shop last night when we worked on this.

[video=youtube;ObqMZnisaEc]https://www.youtube.com/watch?v=ObqMZnisaEc[/video]

First attempt with a 360 Timelapse. ... Fyi 360 Youtube works good on phones and Google Chrome.
 
#45
It looks really good, but I don't understand the bolt length. Why do you want such a long span between the two pivots? Maybe I am missing something, but it seems like you would want that welded in bolt as short as possible so that the entire unit was stronger. I have to think that at the tongue weight of the trailer it won't matter.
 

LBarr2002

LIFETIME
SUPPORTER
#46
It could be shorter. I'd guess the designer used a 6" bolt either so you'd have room to slide parts back and forth and out of the way while welding, or because it's what he had laying around...
 
#47
That is what I figured. I just wasn't sure if there was something in the motion range that I was missing. The designer did a really good job of using off-the-shelf stuff to come up with the motion range. Am I missing something on the hitch mount pivot? How does that spin if you tighten the bolt down? Is it just something that you don't tighten it and you drill it for a pin?

What is the fender plan?
 
#48
The head of the "long bolt" has been ground round to rotate inside of the tube. the sleeve welded against the "ball" keeps it tight. The "ball" is taped for a zerk.

The Bolt thought the draw bar has a insert in it that is precision (Band saw and a file) cut so you can tighten the through bolt but allow the fabricated piece to freely spin, also taped for a zerk.
 
#49
So... If i draw up a solidwords model and send it to you.. you can pop us out a hand full of these :weld:
Send it to me and I'll see what I can do seriously. I've not learned the programming of that yet but the guy who does most of it owes me a few favors and I've been wanting to learn the programming of it.


Sent from my iPhone using Tapatalk
 

LBarr2002

LIFETIME
SUPPORTER
#50
Hitch is done. Tongue height came out perfect with a flat insert on the Jeep side. Stabilizer jacks are long enough, crank handle is long enough (barely), tongue jack is maxed out but works, and the first step out the door is a doozy.

20151115_133830_zpsbiaowiph.jpg

20151115_125007_zps8pyw6ylb.jpg

20151115_125043_zpsh0ggo39r.jpg

20151115_125019_zps21up5nhb.jpg
 

LBarr2002

LIFETIME
SUPPORTER
#52
Since Brooks has his new project in the works it got me motivated to get back on this. This weekend I plan to pick up some 1×2 tube to build rub rails and fenders. I also ordered a charging station panel for inside with 2 USB ports and a cigarette lighter plug.
 

LBarr2002

LIFETIME
SUPPORTER
#55
Very nice! Where did the panel come from? Does the rocker switch turn it on, and if so, is it through a relay?
This is the panel:
https://www.amazon.com/gp/aw/d/B01D4CQ1FI/ref=ya_aw_od_pi?ie=UTF8&psc=1

Rocker switch feeds the panel so the meter and back light aren't on all the time. No relay. The switch is rated for 20 amps and the circuit is on a 15 amp breaker, but it will never pull that. It's tapped in to the trailer's original overhead light wiring that is just 2 led lights.
 

LBarr2002

LIFETIME
SUPPORTER
#57
I ran out of time and energy before hot springs to build my fenders. My plan is very similar to Brooks' but to make them bolt on if possible. Although I'm more concerned about the weight now after dragging that thing loaded up Saluda grade...

To have some kind of coverage for the Hot Springs trip, I bolted the factory plastic fenders back on and went to town trimming them.

Decent coverage from the front, which was my biggest concern knowing it would be towed home behind my pickup.
41265_zpsctlxgq6s.jpg
41269_zps1axihavu.jpg
For anyone behind... sorry
41271_zpslo8c0gxf.jpg

Hopefully before I pull it again I'll have some time to work on it. I think I'm going to use the 1x2 1/8th wall I already bought for the rub rail but get some 1/16th for the rest to lighten it a little.

Oh, and if any JK owners need fender trimming, my services are available for a small fee :grin:
 
Last edited:
#58
I ran out of time and energy before hot springs to build my fenders. My plan is very similar to Brooks' but to make them bolt on if possible. Although I'm more concerned about the weight now after dragging that thing loaded up Saluda grade...

To have some kind of coverage for the Hot Springs trip, I bolted the factory plastic fenders back on and went to town trimming them.

Decent coverage from the front, which was my biggest concern knowing it would be towed home behind my pickup.
41265_zpsctlxgq6s.jpg
41269_zps1axihavu.jpg
For anyone behind... sorry
41271_zpslo8c0gxf.jpg

Hopefully before I pull it again I'll have some time to work on it. I think I'm going to use the 1x2 1/8th wall I already bought for the rub rail but get some 1/16th for the rest to lighten it a little.

Oh, and if any JK owners need fender trimming, my services are available for a small fee :grin:
I used 1/8 for the rub rails and 1/16 for the fenders, I think it was ample. I had originally bought 1/8" for the outer tube on the fender, but decided to squeeze all the fender tubes out of that one stick of 1/16.
 
#59
I just bought the same popup, a 2006 Fleetwood Neon, and am in the process of doing some upgrades. Currently, I am trying to install a 12V charging station similar to the one you installed in yours and am planning on tying into the existing electrical. I was hoping you might be able to talk me through exactly which wires you tied into / where exactly they are located. I know you mentioned tying into the overhead light, but was hoping you might be able to give a detailed description of where you found those wires. I am having a really hard time trying to find a wiring diagram for the Neon. Thank you for any insight you might have!


REPLY
 

LBarr2002

LIFETIME
SUPPORTER
#60
I just bought the same popup, a 2006 Fleetwood Neon, and am in the process of doing some upgrades. Currently, I am trying to install a 12V charging station similar to the one you installed in yours and am planning on tying into the existing electrical. I was hoping you might be able to talk me through exactly which wires you tied into / where exactly they are located. I know you mentioned tying into the overhead light, but was hoping you might be able to give a detailed description of where you found those wires. I am having a really hard time trying to find a wiring diagram for the Neon. Thank you for any insight you might have!


REPLY
If i remember correctly, the harness comes through the floor under the couch. I just tied into the positive and negative there and ran the new wires across inside the front compartment/step, into the passenger side compartment and cut the hole for the panel.
 
Top